Friday, May 31, 2013

Faux Enamel

I've started another blog for my business crafting (www.sablegreyhoundgifts.blogspot.com) and it made me want to resurrect this one for my own projects and experiments.  So to start it back up, here's a little project I made tonight.

I want to create the look of enamel without the cost of starting up a whole new hobby.  With that end in mind, I've tried several different experiments.  Tonight I tried using embossing powder on a silver plated pewter pendant.  Here's the pendant before and after embossing it:


I rather like how it turned out!  The powder tends to settle like real enamel does, giving the piece highs and lows of color.  I did two layers each of the dark and light greens to get a greater depth of color.  Because I was wondering whether the enamel powder was translucent or opaque (this is a different brand than the powder I use on my zibirdies), I layered the light green over the dark green.  In the future, I'd layer them in the opposite order if I want the dark green to have a more pronounced edge.

I'm going to wear it around for the next few days and see how well it holds up, then I'll update this post with my findings.  If it works well, then I hope to be able to use it on other jewelry projects!  :)


Update 06/21/13:  I've been wearing the pendant quite a bit, even sleeping with it on, though that turned out to be incredibly uncomfortable as even jewelry hollies are awfully prickly!  lol  Anyway, the "enamel" is wearing off on the raised portions of the pendant, so I need to find a way to seal it.  I've decided to re-do the embossing powder on both leaves, then try a different sealing technique on each leaf.  One will have a regular clear varnish, the other will have a clear epoxy.  My guess is that the epoxy will give me a better result.  We shall see!

Update 06/22/13:  I picked up the epoxy last night, Mod Podge Dimensional Magic.  I watched a few YouTube videos on how to use it and since it looked pretty straight forward, I went ahead and tried it on the larger of the two leaves.  It's very thick (in fact, you don't even need "walls" to hold it in place), so I ended up drawing a line down the center of the leaf and using a toothpick to pull it into the points.  Though when I applied it the epoxy was cloudy, this morning the leaf was nice and glossy with a hard finish and slightly domed look.  I also painted the smaller leaf with Delta Ceramcoat Gloss Interior Varnish last night.  It is also glossy and hard, but not domed.  I'm going on a trip for a few days and I'm planning on wearing the necklace to see how the two finishes hold up.

Monday, January 16, 2012

Mosaics: the beginning!

Not much to report; I've been busy and lazy, alternately.  Still, last night I sorted out the mixed bucket of tesserae that I bought the other day.  I bought these cheap little tiles so that I could experiment and find out if I liked making mosaics without getting heavily financially committed to making them by buying the much more expensive glass/ceramic tesserae and the proper tools to work with them.  You can cut these little guys with just ordinary scissors!
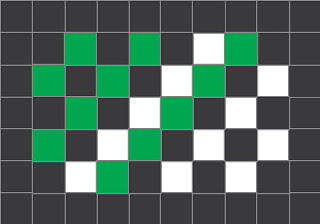
There turned out to be 12 colors, including black(ish) and white.  I decided I'm going to do just a very simple geometric pattern this time, since I don't want to put in a lot of work on something I might screw up.  I bought a little wooden box to cover...after all, we all know I'm addicted to little boxes!  It's a little frustrating because the box only fits 10x7 tesserae, so my design options are limited.  After messing about a bit, I gave up and decided to do this pattern:
Edit:  Here's a pic of the tesserae all glued down.  I messed up early on, so had to adjust the pattern slightly, and I had to use half tiles at the bottom edge to fill in, but it was either that or make the grout gaps uneven horizontal to vertical.  Anyway, so far, so good!

Monday, January 2, 2012

Update and new craft?

Christmas brought the usual mad dash to get stuff done before the yearly "deadline," but I'm proud to announce that I got all my crafty gifts made with time to spare!  I was, however, a total dork and forgot to get pictures of almost everything.  Aaaargh!  So, I shall post a picture of the one item I actually remembered to photograph; meet Genova, a Zibitty I made for my niece, Lisa:


Zibitties are always a challenge to make since they're so tiny!  They're just a fraction of the size of a Zibaby.  It's hard to get everything smooth and blended properly when my tools barely fit into the areas needing to be smoothed.  Still, I really like making Zibitties because they are just so stinkin' cute when they're done!


Next subject: Mosaics!
Due to an Amazon gift certificate from my wonderful sister Valerie and a night filled with insomnia, I am now the proud owner of three books on making mosaics!  I've always loved the pictures I've seen of Roman and other ancient mosaics and I've wanted for years to try my hand at making them.  Each book I ordered focuses on different styles of mosaics: one is on traditional techniques, one discusses using polymer clay, and the other is on making "micro" mosaics.  I'm probably the most curious about that last one.  Here's a 13th century micro mosaic.  Look at the incredible detail!  Can you believe this mosaic is only about 17" high?  Amazing!
It wasn't until the 1800s that micro mosaics became popular in jewelry, but I'm definitely going to try mixing my love of jewelry with this new artform...I'll let you all know how it goes!

Tuesday, November 29, 2011

Not dead, just busy!

Life's been a bit hectic over the last little while!  I've been trying to make a bunch of jewelry, zibies, and zibabies for the holiday shopping season.  This has mostly been accomplished, with some unanticipated downtime due to tendonitis in one of my wrists.  Still, I managed to get a respectable amount of items created!  Below are some pics of a few of my favorites.  You can see all of them on my FB page, website, and Etsy shop.  Oh, and if you check out my website, please let me know if you find any typos, bad links etc, since I just revamped the whole site!  (Only my jewelry website was updated.  If you wander off into my dog website or my SCA one, they're still the same.)


The two pics above are of Grazia, the Zibellino I made for Noelle's sister Melia.  It's hard to see here, but she has dark indigo eyes!

(This set has over 130 hand-set rhinestones!  It is ultra sparkly IRL!)


Tuesday, November 1, 2011

Bronzino's c1550 Portrait of a Lady project: Belt

(This is my ACC project, just renamed and slowly continued...)

I've always loved the belt on my inspiration portrait:
 
It was the first time I'd ever seen a cameo in 1500s Italian jewelry, which was really exciting for me because I love seeing how the same themes/styles are repeated in Italy through the centuries.  Cameos were popular during Roman times, usually depicting deities and emperors/empresses.  They phased in and out of use over the centuries, but they never disappeared completely.  Even though I can't see who is depicted in this cameo, it seems to have the classic styling of a Roman cameo.  For my belt, I chose a mother-of-pearl cameo and set it into a gold plated setting:

Another fun element in this belt are the two little faces on either side of the cameo.  I like to think that they are lion's heads, since the symbol of Venice is St. Mark's winged lion:
A while ago, good friend of mine gave me a pair of earrings that were little jeweled cat heads, saying they reminded her of my zibies and wondering if I could use them in my jewelry.  With a few modifications, they fit in perfectly with this project!  I cut the earring posts off and drilled a hole in the back of each head so I could pass the beading wire through them.  I love the way they match the overall style of  the belt and the way they help me match the feel of the portrait.  Besides all that, I think they add such an adorable touch!  (Just look at their tineh toofers!)

None of the pictures that I could find of this portrait showed the whole tassel at the end of the drop.  This is frustrating because I wasn't sure what to make.  Finally, I found a picture that showed probably half of it, so I had something to work with!  I still couldn't tell if the tassel was made from metal, metal thread, or silk thread, so I decided to just have fun and make something that looked similar but let me play with beaded netting, something I don't get to use often enough, in my opinion!  :)  I netted metal beads and Swarovski crystals around a German crystal drop for the top of the tassel, then made a kind of multi-layer frame for the chain part to hang from.  I incorporated red Swarovski crystals into the outside layer of chain to mimic the gems on the portrait's tassel.  Here are a few pics of the construction of the tassel:

All the bits and parts, including the completed netted crystal drop:

The first, inner layer:

The second, middle, layer.  This is made up of several simple chandelier findings layered into a circle arrangement:

The third, outside, layer.  Here I attached chain around the edges of a round filigree finding.  I also added Swarovski crystals to the edges of the filigree:

Threading the three layers together along with the netted drop:

The completed tassel.  There are several things that I'd do differently if I make another chain tassel like this, but overall I'm pretty happy with it!

The drop and waist portions were pretty straightforward stringing.  I used bead caps and findings with Swarovski crystal to approximate the feel of the portrait's belt.  I really love the way this belt turned out!  It has a wonderful, heavy feel to it, and a ton of sparkle without being gaudy.  I'm hoping Noelle and I get my new gown done before Collegium so I can wear it!
Noelle took some pictures of me wearing my new set (belt, earrings, necklace) with the gown she's sewing for me (which I absolutely LOVE!).

Tuesday, October 18, 2011

ACC: Woe!

After much thought, I am going to have to back out of the ACC.  When I entered, I neglected to take into account the effect the Fall and Winter weather has on my pain levels, which in turn effect how much physical activity (such as sewing, jewelry, & other handwork) I can accomplish.  If my pain dictates I can only do a couple of things a day, then my business orders must come first!  I'm still planning on keeping up on the other entrants' progress, and hopefully I'll still be able to get something new done before Solstice, even if it is only some new accessories.  I was planning on continuing to post my crafty projects to this blog even after the ACC was concluded, so I'm just looking at it this way: that phase of the blog is just being started a little earlier!

So, I hope my followers won't stop checking in on my little crafty world...I still hope to be able to share some of my inspiration with you and read your comments!  :)

Saturday, October 8, 2011

ACC: Earrings mockup

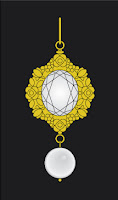
I've always liked Maria di Cosimo's earrings in this portrait:
Her earrings aren't the usual simple drop pearl, but rather a pearl suspended from a diamond setting.  Simple but beautiful!  I have all the findings to make these except for the "diamonds."  So, while I'm waiting for mine to show up (though, alas, I could only afford cubic zirconia!), I consoled myself by "making" them in Illustrator, replicating as closely as I could the findings I'll be using: